
Metal Roof Installation: Process, Timeline & Key Benefits
A professional metal roof installation is one of the longest-lasting exterior upgrades a homeowner can make, replacing a 20-year asphalt roof with a system designed to outlast the next two or three. The process moves through a defined sequence of tear-off, deck prep, underlayment, flashing, and panel installation, and most homes are finished in three to seven working days depending on roofline complexity. Understanding what happens at each stage, how long it takes, and the benefits you actually gain helps you choose the right contractor, set realistic expectations, and feel confident about a system that will protect your home for decades. There are various installation videos available for metal roofing and siding that cater to both beginners and experienced contractors, providing step-by-step visual guidance.
- Timeline: Most residential metal roof installations take 3 to 7 working days from tear-off to cleanup.
- Process: Installation moves through tear-off, deck inspection, underlayment, flashing, panel installation, and trim work.
- Benefits: 50 to 70 year lifespan, lower cooling costs, impact resistance, strong resale value, and low maintenance. Metal roofs are also resistant to moss, mold, and other organic growth, which can be an advantage over asphalt roofing.
What Happens Before the Metal Roof Installation Begins?
Quality metal roof installation starts well before the first panel goes up, with a careful planning phase that protects both the homeowner and the workmanship of the finished system. The pre-installation steps ensure the right materials arrive on the right date and the home is prepared for several days of active work. As part of the initial layout process, it is important to establish a reference line or point to guide accurate panel placement throughout the installation.
How Does the Inspection and Estimate Process Work?
The inspection and estimate process begins with a contractor visiting the home, measuring every plane of the roof, checking the condition of the existing decking and fascia, and identifying any flashing, penetration, or ventilation issues that need to be addressed during installation. A thorough estimate itemizes the panel type and gauge, fastener system, underlayment grade, ridge and edge metal, ice and water shield coverage, tear-off scope, and any deck repairs anticipated. Most contractors provide written estimates within three to seven days of the inspection, and homeowners should always get at least two or three bids to compare scope and price.
- Roof measurement: Total squares calculated by measuring every plane and accounting for pitch.
- Deck inspection: Visual and probe inspection of existing sheathing for rot, soft spots, and damaged areas.
- Itemized scope: Panel type, gauge, finish, underlayment, flashing details, and fastener system listed separately.
- Comparison bids: Two or three written estimates from licensed contractors recommended before signing.
What Permits and Materials Are Required Up Front?
Most jurisdictions require a building permit for a full residential reroof, with permit fees ranging from $150 to $750 depending on the city or county. The contractor typically pulls the permit and schedules required inspections at tear-off and final completion. Material delivery happens one to three days before installation begins, with roofing and siding panels staged in a dry area near the home and underlayment, fasteners, flashing, ridge cap, and trim coordinated to match the panel finish. Custom panel lengths cut on a portable roll-former onsite can shave one to two days off the installation timeline.
- Building permit: Required in most jurisdictions, typically pulled by the contractor.
- Material delivery: Roofing and siding panels, along with trim, delivered one to three days before work begins.
- Onsite forming: Portable roll-formers allow custom panel lengths cut to fit each roof plane.
- Color and finish: Factory-applied Kynar 500 or SMP finishes are confirmed at the time of order.
7 Steps in the Metal Roof Installation Process
The metal roof installation process involves installing metal roofing and siding panels through a defined sequence of seven steps that must occur in order, as each stage protects and prepares the surface for the next. Skipping or rushing any step compromises the long-term performance and warranty coverage of the finished roof.
1. How Does Tear-Off and Deck Inspection Work?
Tear-off removes the existing roof down to the decking, allowing the installation crew to inspect every square foot of sheathing for rot, water damage, soft spots, and structural concerns that are invisible from the ground. Most crews tear off in sections and immediately tarp or cover exposed decking to protect the home from weather during the workday. Damaged decking, typically 5 to 10 percent of the total area on older homes, is replaced with new OSB or plywood at $70 to $100 per sheet installed before underlayment goes down.
- Full tear-off: Existing shingles, underlayment, and flashing removed down to the deck.
- Deck inspection: Every plane walked and probed for rot, delamination, and damaged sheathing.
- Deck replacement: Damaged sheets replaced before any new roofing material is installed.
- Debris management: Tear-off material loaded into a dumpster staged in the driveway.
2. What Underlayment Is Installed Before the Panels?
Underlayment is the waterproof layer installed directly on the decking that serves as a secondary barrier against water intrusion if a panel or seam ever fails. Quality metal roof installations use a high-temperature synthetic underlayment rated for the heat that builds up under metal panels, with self-adhered ice and water shield at the eaves, valleys, and around all penetrations. In cold climates, ice and water shield should extend at least 24 inches inside the exterior wall line at the eaves to protect against ice dam intrusion.
- High-temp synthetic: Rated for the elevated temperatures under metal, lasts 25 plus years.
- Ice and water shield: Self-adhering membrane at eaves, valleys, and penetrations.
- Code coverage: Ice and water shield typically extends 24 inches inside the warm wall line.
- Manufacturer specs: Always installed per panel manufacturer’s published requirements for warranty.
3. How Are Flashings and Edge Metal Installed?
Flashings and edge metal are installed before the panels and form the watertight transitions at every roof penetration, valley, eave, rake, sidewall, and headwall. Drip edge goes at the eaves to direct water into the gutters, rake metal protects the gable edges, valley flashing channels water down to the eaves, and step flashing weaves with the panels at sidewalls. Most flashing is fabricated from the same gauge and finish as the panels so the entire system ages together.
- Drip edge: Installed at all eaves to direct water cleanly into gutters.
- Valley flashing: W-style or open valley metal channels water from intersecting roof planes.
- Penetration flashing: Custom or pre-formed boots seal around pipes, vents, and chimneys.
- Sidewall and headwall: Step and counterflashing weave with the panel installation for watertight transitions.
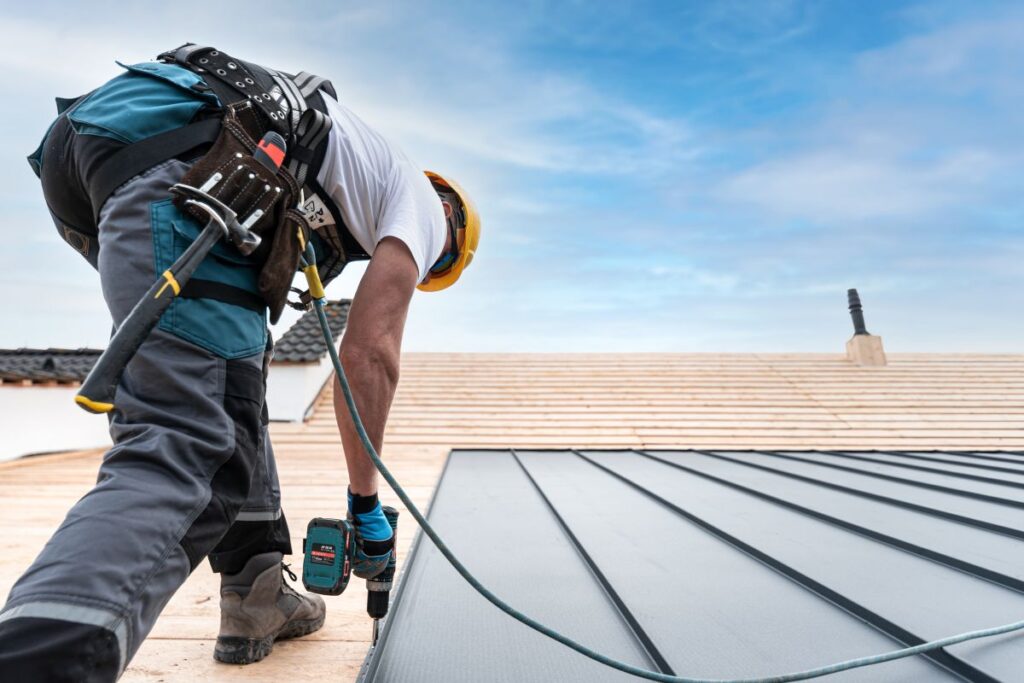
4. How Are the Metal Panels Installed?
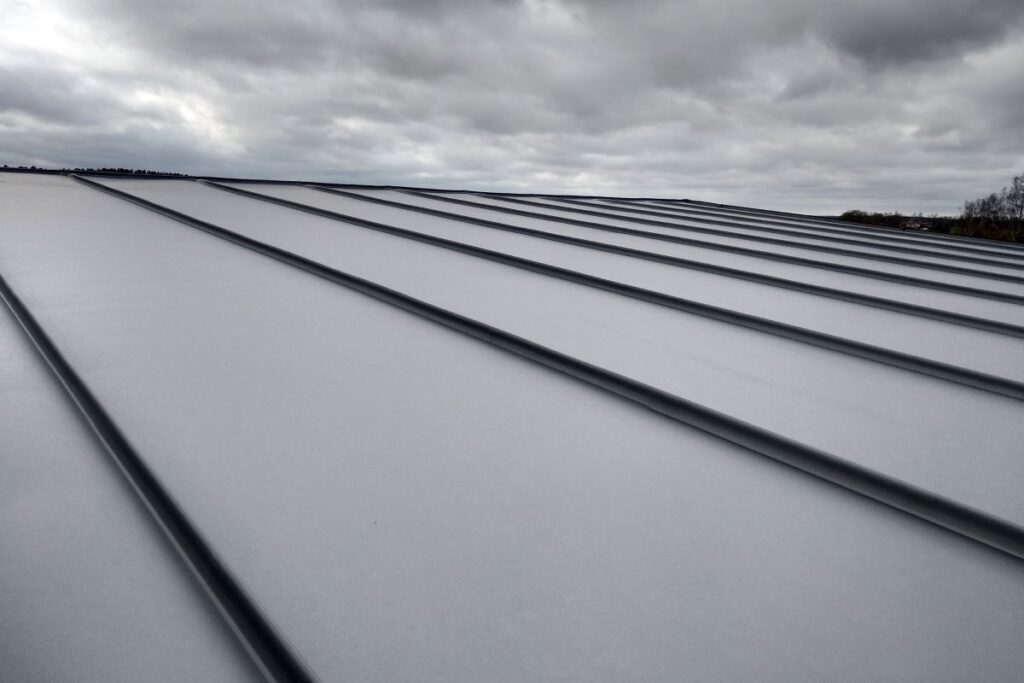
Metal panels are installed from the eave upward, with each panel locked or fastened to the previous panel and secured to the decking with clips or screws depending on the system. Standing seam systems use concealed hidden clips that allow the panels to expand and contract with temperature changes without stressing the fasteners, while exposed-fastener systems use gasketed screws driven through the panel face directly into the decking. Panel installation is the longest single step in the process, typically taking one to three days on a residential home.
- Eave to ridge: Panels installed bottom-up so upper panels overlap lower panels for water shedding.
- Hidden clips: Standing seam systems use clips that allow thermal expansion and contraction.
- Exposed fasteners: Corrugated and ribbed systems use gasketed screws driven through the panel face.
- Seam locking: Mechanical or snap-lock seams sealed at the top of each panel run.
5. How Are the Ridge, Hip, and Trim Pieces Installed?
Ridge, hip, rake, and other trim pieces are installed last and complete the watertight envelope of the system. A vented ridge cap is the standard finishing detail for most metal roofs, allowing hot air to escape from the attic while keeping water and pests out. Closure strips and butyl tape seal the corrugations or seams under each trim piece so wind-driven rain cannot enter the attic. Quality trim work is one of the clearest signs of an experienced metal roof installer.
- Ridge cap: Vented ridge allows attic exhaust airflow while sealing against weather.
- Hip caps: Pre-formed trim covers hip seams on cut-up rooflines.
- Closure strips: Foam or rubber inserts seal the panel profile under ridge and hip caps.
- Sealants: Manufacturer-approved butyl tape and polyurethane sealants at every overlap.
6. How Are Penetrations and Pipe Boots Sealed?
Every roof has penetrations for plumbing vents, exhaust fans, electrical masts, HVAC stacks, and skylights, and each one is a potential leak point if not flashed properly. Metal roof installers use either custom-fabricated metal flashings or specialized EPDM and silicone pipe boots designed for the panel profile. Penetration flashing is one of the most common warranty issues on a poorly installed metal roof, which is why manufacturer certification programs spend so much training time on this single detail.
- Pipe boots: EPDM or silicone boots sized to the pipe diameter and panel profile.
- Custom flashings: Hand-fabricated metal pans for chimneys, skylights, and large penetrations.
- Sealant choice: Polyurethane or silicone sealants rated for metal roofing applications.
- Inspection access: Penetrations should remain accessible for periodic inspection without damaging panels.
7. What Happens During Final Inspection and Cleanup?
Final inspection includes a complete walk of the finished roof by the installation lead, checking every panel seam, trim piece, flashing detail, and sealed penetration for proper installation and finish quality. The crew uses a magnetic sweeper to collect every nail, screw, and metal cutting from the yard, driveway, and surrounding landscaping. The contractor then walks the homeowner through the warranty paperwork, maintenance recommendations, and any final permit inspection required by the municipality.
- Quality walk: Lead installer checks every panel, seam, fastener, and trim detail.
- Magnetic sweep: Every square foot of yard and driveway swept for metal debris.
- Homeowner walkthrough: Final inspection together to confirm finish quality and address questions.
- Permit close-out: Municipal final inspection scheduled and passed before the warranty is registered.
How Long Does Metal Roof Installation Take?
Most residential metal roof installations take three to seven working days from tear-off to final cleanup, with the timeline driven by roofline complexity, weather, and crew size. A simple ranch with one or two roof planes finishes faster than a multi-story home with valleys, dormers, and skylights, and weather delays are the most common cause of timeline overruns.
What Drives the Installation Timeline Up or Down?
The biggest timeline drivers are roof size, roofline complexity, weather, crew size, and material lead time. A 25-square ranch with a simple gable roofline may finish in two to three days with a four-person crew, while a 50-square two-story with multiple valleys, dormers, and skylights can stretch to seven to ten days. Spring and summer installations move fastest because daylight is long and weather windows are predictable. Winter installations are possible but typically take 25 to 50 percent longer because of shorter days, ice and snow on the deck, and the need to keep adhesives and sealants warm enough to bond properly.
- Roof size: Each additional 10 squares typically adds one full crew day.
- Complexity: Valleys, dormers, hips, and skylights each add hours or days of flashing detail work.
- Crew size: A four to six person crew finishes most residential homes in less than a week.
- Weather: Rain, high wind, and cold temperatures all extend installation timelines.
What Should Homeowners Expect Day to Day?
Homeowners should expect crews to arrive between 7 and 8 a.m. and work until early evening on most installation days. Day one is the loudest because of tear-off, dumpster activity, and material staging. Days two through five focus on underlayment, flashing, panels, and trim work, with steady but quieter activity on the roof. The final day typically involves cleanup, walkthrough, and permit inspection.
- Day one: Tear-off and deck inspection, the loudest and busiest day.
- Mid-installation: Steady panel and flashing work, less ground-level activity.
- Final day: Trim, cleanup, walkthrough, and permit final.
- Yard protection: Tarps and plywood protect landscaping and driveways throughout the work.
What Are the Key Benefits of Metal Roof Installation?
Metal roof installation delivers measurable benefits in lifespan, energy efficiency, durability, sustainability, and resale value that justify the premium over asphalt for most homeowners with long ownership timelines. Each of these benefits is documented by independent industry research, manufacturer warranties, and real-world performance across millions of installed homes.
How Long Does a Metal Roof Last Compared to Asphalt?
A quality metal roof lasts 50 to 70 years on average, two to three times longer than the 15 to 30 year service life of asphalt shingles. Premium materials like copper and zinc routinely pass the 100-year mark, while standard steel and aluminum systems carry 30 to 50 year manufacturer warranties. Over a 60-year ownership period, a homeowner installs roughly one metal roof versus two or three asphalt roofs, which often makes metal the cheaper option per year of service even before factoring in energy savings.
- Standing seam: 50 to 70 years with minimal maintenance.
- Metal shingles: 40 to 60 years depending on coating and gauge.
- Premium copper: 75 to 100 plus years with virtually no maintenance.
- Warranty backing: 30 to 50 year manufacturer warranties standard on quality systems.
How Does a Metal Roof Save Energy?
Metal roofs save energy primarily by reflecting solar radiation instead of absorbing it as heat, which reduces the cooling load on the home throughout the warm months. Reflective coatings on cool-rated metal panels can cut summer cooling costs by 10 to 25 percent in warm and mixed climates. The federal ENERGY STAR program qualifies hundreds of cool metal roof products, and many homeowners pair their installation with solar panels because standing seam systems support clamp-mounted solar without penetrating the roof.
According to the U.S. Department of Energy’s Federal Energy Management Program, cool roofs stay up to 60 degrees Fahrenheit cooler than traditional black roofs during the summer, which directly reduces air conditioning loads and lowers cooling bills throughout the warm months.
- Cooling savings: Reflective metal roofs reduce summer cooling costs by 10 to 25 percent.
- ENERGY STAR: Hundreds of qualifying cool metal products available from major manufacturers.
- Solar ready: Standing seam panels support clamp-mounted solar without roof penetrations.
- Color matters: Light-colored, painted metal delivers the highest energy performance.
How Durable Is a Metal Roof in Severe Weather?
Metal roofs handle severe weather better than any other common residential roofing material, with wind ratings up to 140 mph, UL 2218 Class 4 impact resistance against hail, and Class A fire ratings. Standing seam systems shed snow cleanly and resist the ice dam formation that damages shingle roofs, and they will not curl, crack, or lose granules under UV exposure. Insurance carriers often offer 5 to 30 percent homeowners insurance discounts on Class 4 impact-resistant roofs.
- Wind: Rated up to 140 mph with proper installation.
- Hail: Class 4 impact resistance, the highest UL rating available.
- Fire: Class A fire rating, the highest fire safety rating for roof assemblies.
- Snow and ice: Sheds snow cleanly and resists ice dam formation.
Frequently Asked Questions
How Much Does Metal Roof Installation Cost?
Metal roof installation typically costs $10 to $20 per square foot installed for steel or aluminum standing seam on an average home, with copper and zinc systems running $20 to $40 per square foot. For a 2,000 square foot roof, that works out to $16,000 to $28,000 for steel or aluminum and $40,000 or more for premium copper. Final pricing depends on panel type, roofline complexity, tear-off scope, and local labor rates.
Can Metal Be Installed Over Existing Shingles?
Many municipalities allow metal roofing to be installed directly over a single layer of existing asphalt shingles, which can save $1,000 to $2,500 in tear-off costs. The decking and rafters must be structurally sound, local code must permit the overlay, and the installer typically adds a separation layer or batten system. A licensed contractor will know your local code and recommend the right approach for your home.
Are Metal Roofs Loud During Rain?
Modern metal roofs installed over solid decking with proper underlayment are no louder than asphalt shingles. The myth comes from old barn-style installations with panels fastened directly to open framing. Residential standing seam systems include plywood or OSB decking, synthetic underlayment, and attic insulation that absorb sound effectively.
Does Installation Disrupt My Daily Routine?
Most homeowners can stay in their home during a metal roof installation, though the noise of tear-off and panel work is significant. Plan for one to two loud days at the start, followed by steadier but quieter work for the rest of the installation. Pets and small children may be more comfortable away from the home during the loudest hours.
Will My Homeowners Insurance Premium Change?
Many insurance carriers offer 5 to 30 percent premium discounts for Class 4 impact-resistant roofing, which most standing seam metal systems qualify for. Discounts vary by carrier, state, and policy, so call your agent before installation to confirm what is available. Provide the manufacturer’s UL 2218 certification documentation when you file for the discount.
What Maintenance Does a Metal Roof Need?
Metal roofs need very little maintenance compared to asphalt shingles, typically just periodic debris removal from valleys and an inspection of sealants at penetrations every five to ten years. Exposed-fastener systems benefit from a fastener check every 10 to 15 years to retorque or replace any screws that have backed out. Standing seam systems with hidden clips are essentially maintenance-free for the first 25 to 30 years.
Why 5 Star Roofing and Contracting Is the Right Choice for Your Metal Roof Installation
A metal roof installation is a 50-plus year decision, and the contractor you choose has more impact on long-term performance than almost any other variable. 5 Star Roofing and Contracting brings the experience and credentials that protect that investment, including IKO ShieldPRO Certified Contractor status, HomeAdvisor Top Rated recognition, full licensing, and 24/7 emergency repair availability for the rare issue that needs immediate attention. Our team walks every property, measures every plane, inspects every section of decking, and installs panels and flashing details to manufacturer specifications so the warranty stays intact and the roof performs as designed for decades. Reach out to 5 Star Roofing and Contracting today for a free, no-pressure quote on your metal roof installation and get clear, honest expert guidance on the system that fits your home, your climate, and your long-term plans.
